Variable Area Flowmeter - Description of the measuring principle

The variable area flowmeter is a reliable, inexpensive and often used method for measuring the flow of liquids,
gases and vapours in industrial applications. They are characterised by their high measuring accuracy and are
suitable for a wide range of flow rates.
The measuring principle is based on the buoyancy of a float in a pipe, which is influenced by the flow of the liquid.
The float usually has a spherical or cylindrical shape.
The basic design of a variable area flowmeter consists of a conical, vertically mounted measuring tube in which a
"float" can move freely up and down.
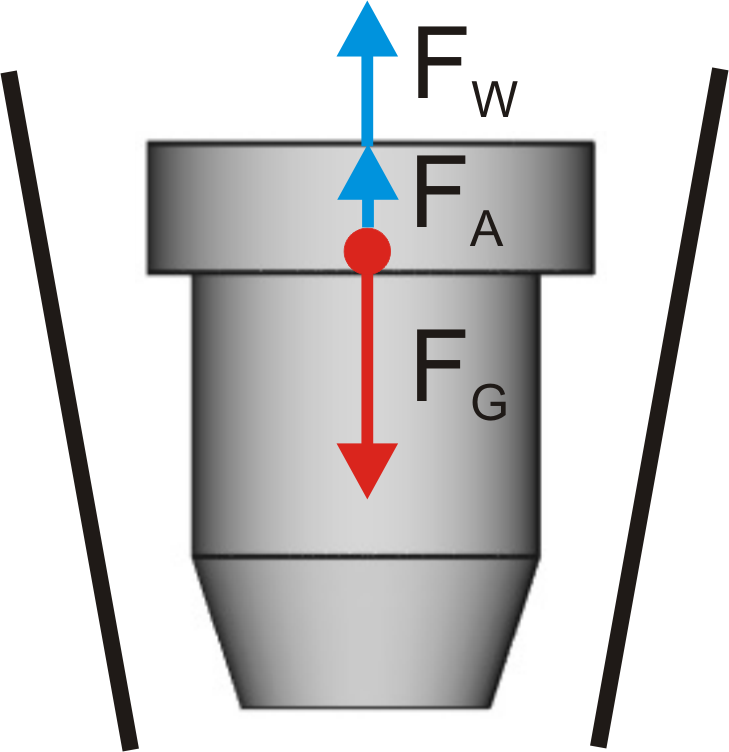
Three forces act on the float.
- FG=The weight force of the float.
This depends on the mass of the float. In order to obtain different masses for the same dimensions of the float, a wide variety of materials are used, e.g. glass, metal, plastics, are used. When selecting the material, the chemical resistance to the fluid must of course be taken into account. A further weight reduction is achieved by using hollow floats. - FA= The buoyancy force of the float, which depends on the mass of the fluid displaced by the float, i.e. the volume of the float and the fluid.
- FW= The resistance force which depends on the flow and the annular gap between the measuring tube and the float.
FW = FG - F A
If the flow is changed, this equilibrium is altered and the float rises or falls.
This changes the annular gap between the measuring tube and the float and thus the force(FW).
This continues until equilibrium is restored and the float is floating again.
The level of the float is thus a direct measure of the flow, which can be read on a calibrated scale.
By combining measuring tubes of different diameters with floats of different weights and diameters, a wide range
of different measuring ranges is obtained. Particularly in the laboratory, longer measuring tubes with a small
angle of inclination are often used to increase the resolution of the scale and the measuring accuracy.
Measuring range
The measuring range (also known as the turn-down ratio) for a variable area flow meter refers to the ratio between the largest and smallest flow rates that the device can reliably measure within a measuring tube.
For variable area flow meters (Rotameters), the measuring range is usually between 1:10 and 1:12.
This means that:
If the maximum measured value is, for example, 100 l/h, the same flow meter can still reliably measure from
approx. 8–10 l/h.
The limitation of the range is related to the following factors:
- Floating body geometry:
With very low flow rates, display accuracy is limited by friction and reading errors. - Flow profile:
With very high flow rates, turbulence or vibrations can make measurements inaccurate. - Material and medium:
Gas vs. liquid, density differences, and viscosity influence the measurement limits.
All technical articles published on pt100.de with attribution were written or reviewed by Harald Peters himself.
Author of this article:
Harald Peters – Technical author for flow measurement technology.
